Tutorials | HDR Tone Mapping Techniques
Introduction
What does High-Dynamic Range (HDR) mean?
|
Why create HDR images?
I've heard people say they don't like HDR images. It should be noted that what they usually don't like is the effect of the tone mapping back to an 8 or 16 bit image. Certainly this is the main area we are going to cover and it's easy to "overdo" the effect to make images look unnatural. I often wonder if it's these overcooked images that give people reason to say unfavourable things about HDR.
Some people do it because they like an strong "HDR Effect". I.E. they specifically look for this effect which I describe as overcooked.
I do it so I can increase the dynamic range of my camera. By that I mean to ensure I capture the full range of detail in the brightest and darkest parts of a scene. Partly this is because I'm useless at exposing correctly in the first place, partly I find filters clumsy and partly because I enjoy the post processing procedure. In any case, I do try to create photo-realistic images even although I use HDR techniques. My goal with most of my HDR processing is to trick someone who knows and doesn't like HDR into not knowing the image is HDR in the first place.
Preparation
Well, you'll obviously need images to process. I'm going to assume you shoot RAW. I'm also going to assume you shoot multiple exposures - These techniques can be used on a single RAW file processed at multiple EV levels but your mileage may vary as there's only a limited amount of detail within a single RAW file - albeit more than in a JPG.
I use the bracketing function on my camera, expose my first frame as near to perfect as I can then shoot two others at +2ev and -2ev. It goes without saying, a tripod is absolutely essential.
Caveat: If your subject has movement (flowing river, waves, trees in a breeze etc) then this can have a adverse affect on the final result. More up to date versions of Photomatix handle this quite well and processing manually will obviously give you ultimate control but I found Photoshop handles movement pretty badly.
You'll need Photomatix and/or Photoshop CS2 (or above) for some of the techniques described.
Techniques
There are 3 work-flow techniques I regularly use. These are by no means definitive but I will stick with the ones I use - Notice I don't say "know". I'm learning here as much as the next person so it would be incorrect to say i "know" any of them.
My favoured techniques are: -
- Photomatix - Using Photomatix to perform HDR generation and tone mapping.
- Photoshop - Using Photoshop (Automate | Merge To HDR...) for HDR generation and tone mapping.
- Manual - Manually blending layers in Photoshop
Note
You can use Photomatix to do the HDR file generation then perform the tone mapping in Photoshop. Likewise you could generate the HDR file in Photoshop then tone map in Photomatix. I'm not sure either would bring any benefit however.
Clipping
Another point worth mentioning is that with both Photomatix and Photoshop can produce visible clipping. For example, look at the crop of an image below. As you can see in the top left quadrant, the sky in this area has clipped to a pink blob. Certainly the sky isn't clipped in the RAW file exposed for the sky so I can only assume this is an effect of the tone mapping algorithms.
The easiest way to rectify this is to either blend it with the smudge tool or use the healing tool in order to merge it with the surrounding area.
Halos
It's possible to create halos during the tone mapping process. This can happen when you have a dark object against a bright one. For example a building or tree against the sky. See the Wikipedia entry on tone mapping for some examples. Some people do it deliberately for their own reasons, me? I can't stand it.
Photomatix
Photomatix can do HDR file generation as well as tone mapping. I quite like this software and version 3 is a vast improvement over previous versions.
At this point I'd go through a step by step guide to use Photomatix but there isn't much point in me repeating work already done... So why not take a look at this tutorial by GainfulShrimp over at pixalo.com.
Don't be shy about fiddling with the tone mapping controls. You can always redo the HDR if you're not happy with the results.
Good luck, have fun.
Photoshop
Like Photomatix, Photoshop can generate the HDR file as well as perform the tone mapping.
I can't make up my mind about the tone mapping in Photoshop. Sometimes it seems to work really well while with others, I gawp in horror! Given that the subject matter I shovel into the software tends to be the same, landscapes, I'm not really sure why I see such a large variation. That said it can work very well and it's really just down to personal preference. Photoshop is particularly good at controling halo's however and with care can produce more photo-realistic results than Photomatix.
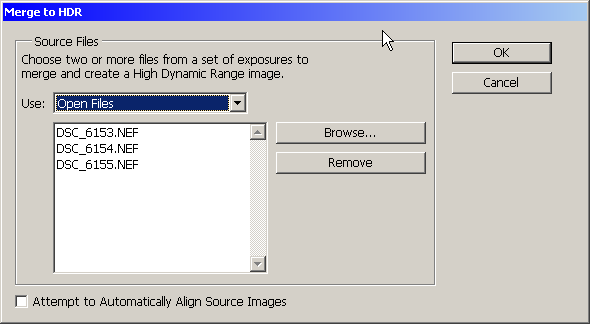
OK, let's get started. Firstly, we'll generate the HDR file. To do this we must load our images. Select the File menu: -


File | Automate | Merge To HDR...

Select your source images as appropriate
|
Once you've selected your images, press the OK button to generate the HDR.

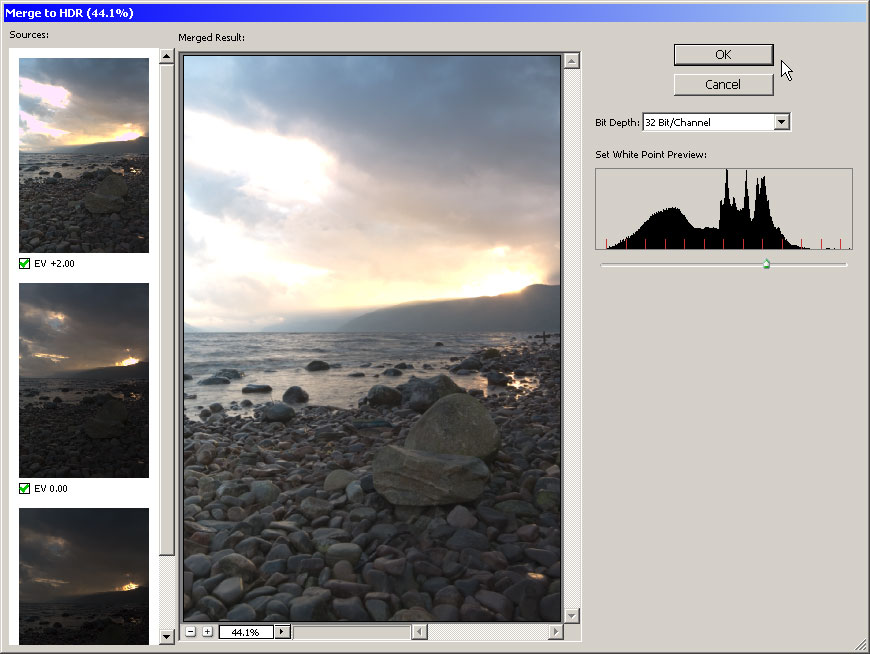
Photoshop will then work away to generate a preview of the final HDR. The slider at the top right will let you change the white point (vary the brightness). Don't worry about this, any change you do here will not affect the final result. The slider only adjusts the preview.
Once Photoshop has generated the HDR you should have an image on screen that's frankly, pretty horrible. The next step is to do the tone mapping
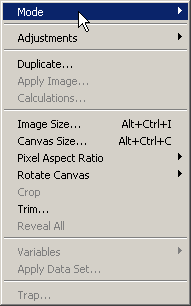
From the menu, select
 |
 |
Image | Mode | 16 Bits/Channel

This is where Photoshop gets a little complicated - so much so I'm going to quote from Mikkel Aalands' book "Photoshop CS2 RAW" (ISBN: 0596008511)
|

Preview Tip
If you zoom out of your image to view it all then any changes should be pretty fast. If you're zoomed in to look at detail then be aware it can take quite a while for the preview to update after a change.
Once you are happy with the preview. Click the OK button. Now go get a cup of coffee. It can take a while.
With your 16 bit image created you can now continue with the rest of your work-flow as normal.
Manual
This is by far my favourite method. If find it very relaxing and can easily spend hours tweaking my picture.
The manual technique is simply about layering your individual exposures one on top of the other then masking out parts you want hidden - or masking in the parts you want shown. This technique takes a lot of brush work giving very fine control over which exposure is visible where.
This technique is also useful for when there is movement between frames. With the fine control you can choose exactly which layer to use finely blend in highlight or shadow details.
Brush Tip
If you've not got a graphics tablet then think about getting one if you do this a lot. I've got an excellent 3000dpi gamer mouse and a rather nasty £25 tablet and for brush work the tablet is miles better. The extra dimension of pen pressure a tablet gives allows you to be really delicate with the brush as well as feeling a more natural way of working.
 |
In my Photoshop Layers tab you can see the three exposures I took, Layer 0 : -2EV If you know your masks then you'll be aware, from top to bottom (ignoring the adjustments), Layer 0 is mostly blacked out with only the very brightest part - the sun - allowed to show through. With the Layer 1, all the sky is shown along with a touch of highlight on the water. Layer 2 is completely visible but is occluded by the the relevant parts of Layers 0 & 1 above it. What you're left with is the foreground rocks and the water - but toned down slightly. Now in this particular example, the waves have moved between frames. By very gently (Brush @ 1% flow) painting in Level 1 on top of the Layer 2 we can minimise the problems caused by this movement. |
UPDATE!
I've completed a short video tutorial on exactly how I go about doing this. See here: -
Results
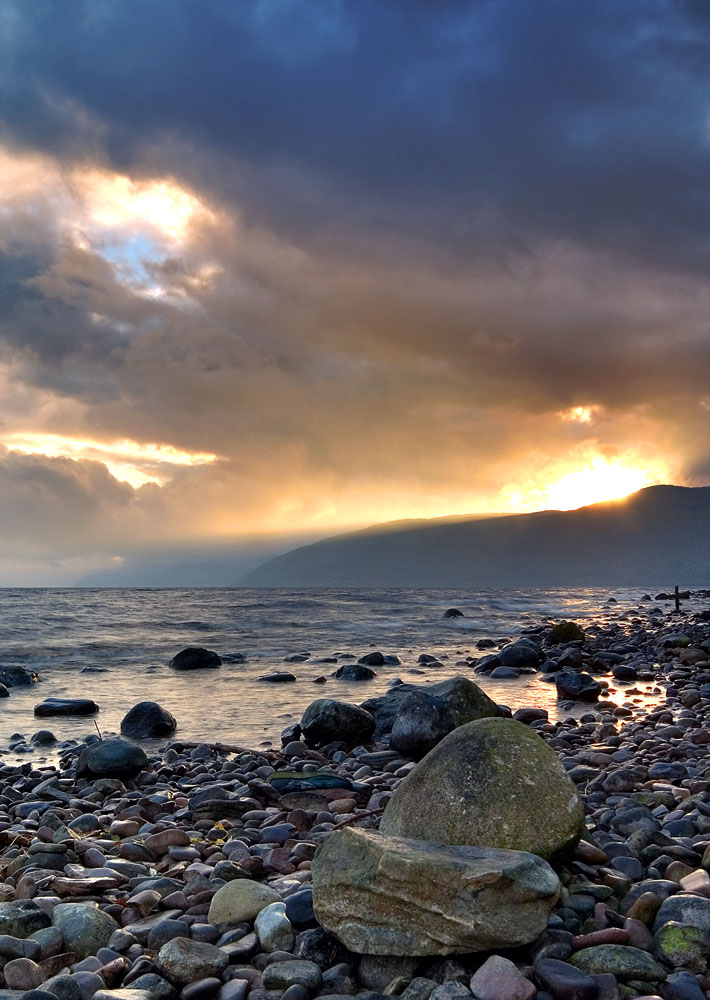
Here I've made 3 images using each of the techniques described above.
|
|
| Photomatix Tone Mapping |
|---|
|
|
| Photoshop Tone Mapping |
|---|
|
|
| Manual Tone Mapping (DRI - Dynamic Range Increase) |
|---|
Which is best is down to your own tastes really. For me there are aspects of each that I like. For that reason I wouldn't be particularly shy about pulling each of those aspects together into yet another image - which would then become my final result.
In particular, I'd take the rocks and foreground from the Photoshop version and the sky from the manual version.
There is a lot of work there, it's really up to you as to whether or not it's worth it.
Neil.


